Git for Mathematicians (3a): The Practice [setup and init]
- Published
- Published .
- Part 1: Preliminaries
- Part 1: Preliminaries.
- Part 2: The Theory
- Part 2: The Theory.
- Part 3a: The Practice
- Part 3a: The Practice.
- Part 3b: Daily Work
- Part 3b: Daily Work.
After a long hiatus, here is the third installment of my series of posts about Git for Mathematicians 🙂. I explain the basics of how one would go about using Git to write a math paper. If you have not read the previous parts of the series, you can find them here:
- Part 1: Preliminaries, where I explain quickly what Git is and why you could be interested in this series.
- Part 2: The Theory, where I explain at a high level the inner workings and data model used by Git.
This part covers installation and creating a repository. Part 3b continues with the everyday cycle of editing, committing, pulling, pushing, and resolving conflicts.
I will mainly use GitHub to host the remote repository, but feel free to use another service, such as GitLab or Bitbucket.
Note
I will assume some familiarity with using a terminal to run commands. Graphical alternatives such as GitHub Desktop and Visual Studio Code expose the same Git operations, but their interfaces are beyond the scope of this series.
Setup
The first thing to do is set up your environment. You will, of course, need to install Git. This is dependent on your OS:
- On Windows and macOS, start from Git’s official installation page. On Windows, the installer includes Git Bash, although Git also works from PowerShell or Windows Terminal.
- On Linux, use your package manager. For example, run
sudo apt install giton Debian/Ubuntu, orsudo dnf install giton Fedora. Otherwise, if you are running Linux, I assume that you are well-versed enough to know how to use your distribution’s package manager.
Before going further, configure your name and email so that your commits are attributed correctly. Git may refuse to commit if it cannot determine an identity; otherwise it may guess one that you did not intend to publish. This will also serve as a test run to see if you are able to run the Git commands. To configure your contact details, run the following commands in a terminal (replace “Your Name” and “your@email.com” with your own name and email, but keep the quotes):
# run the following commands in a terminal
git config --global user.name "Your Name"
git config --global user.email "your@email.com"
git config --global init.defaultBranch main
Note that these commands are typical of how most Git commands work:
- The first part,
git, is common to all Git commands. - The second part,
config, represents a specific Git subcommand. Examples includeinit,commit, orpush. To learn more about the options and meaning of a specific subcommand, you can typeman git-SUBCOMMANDin your terminal (or Git Bash on Windows) or look for the manual page in the documentation. - The rest (
--global user.name "Your Name") are arguments of the specific subcommand. Here, you are telling thegit-configsubcommand to setuser.nameto “Your Name” globally.
Running these commands will change Git’s global configuration file for your account.
This file, called .gitconfig, is located in your user’s home directory (usually /home/[user] on Linux, or C:\Users\[user] on Windows).
Afterwards, the file should look like this:
[user]
name = Your Name
email = your@email.com

[init]
defaultBranch = main
The email address is stored in every commit and may become public when you push to a public repository.
If that matters to you, hosting services such as GitHub can provide a private noreply commit address.
Repositories
As I explained in my previous post, Git is structured around repositories.
A repository is a folder whose version-control data is stored in a special .git subfolder.
It contains working files as well as Git’s record of commits, branches, and so on.
There are essentially two ways to create a repository on your computer: either you can create a brand-new repository that you can then push somewhere, or you can clone an existing repository.
I will explain both options, starting with the (simpler) cloning.
Cloning a repository
Cloning a repository simply means creating a local copy of a remote repository. This local copy will contain (unless you choose otherwise) the full history of the repository, and the files tracked by Git in their latest state. You must be connected to the Internet (if the repository is online) and you must be able to read it if it is private.
If you have not already created a repository, you can create one on GitHub, as in the following screenshot:
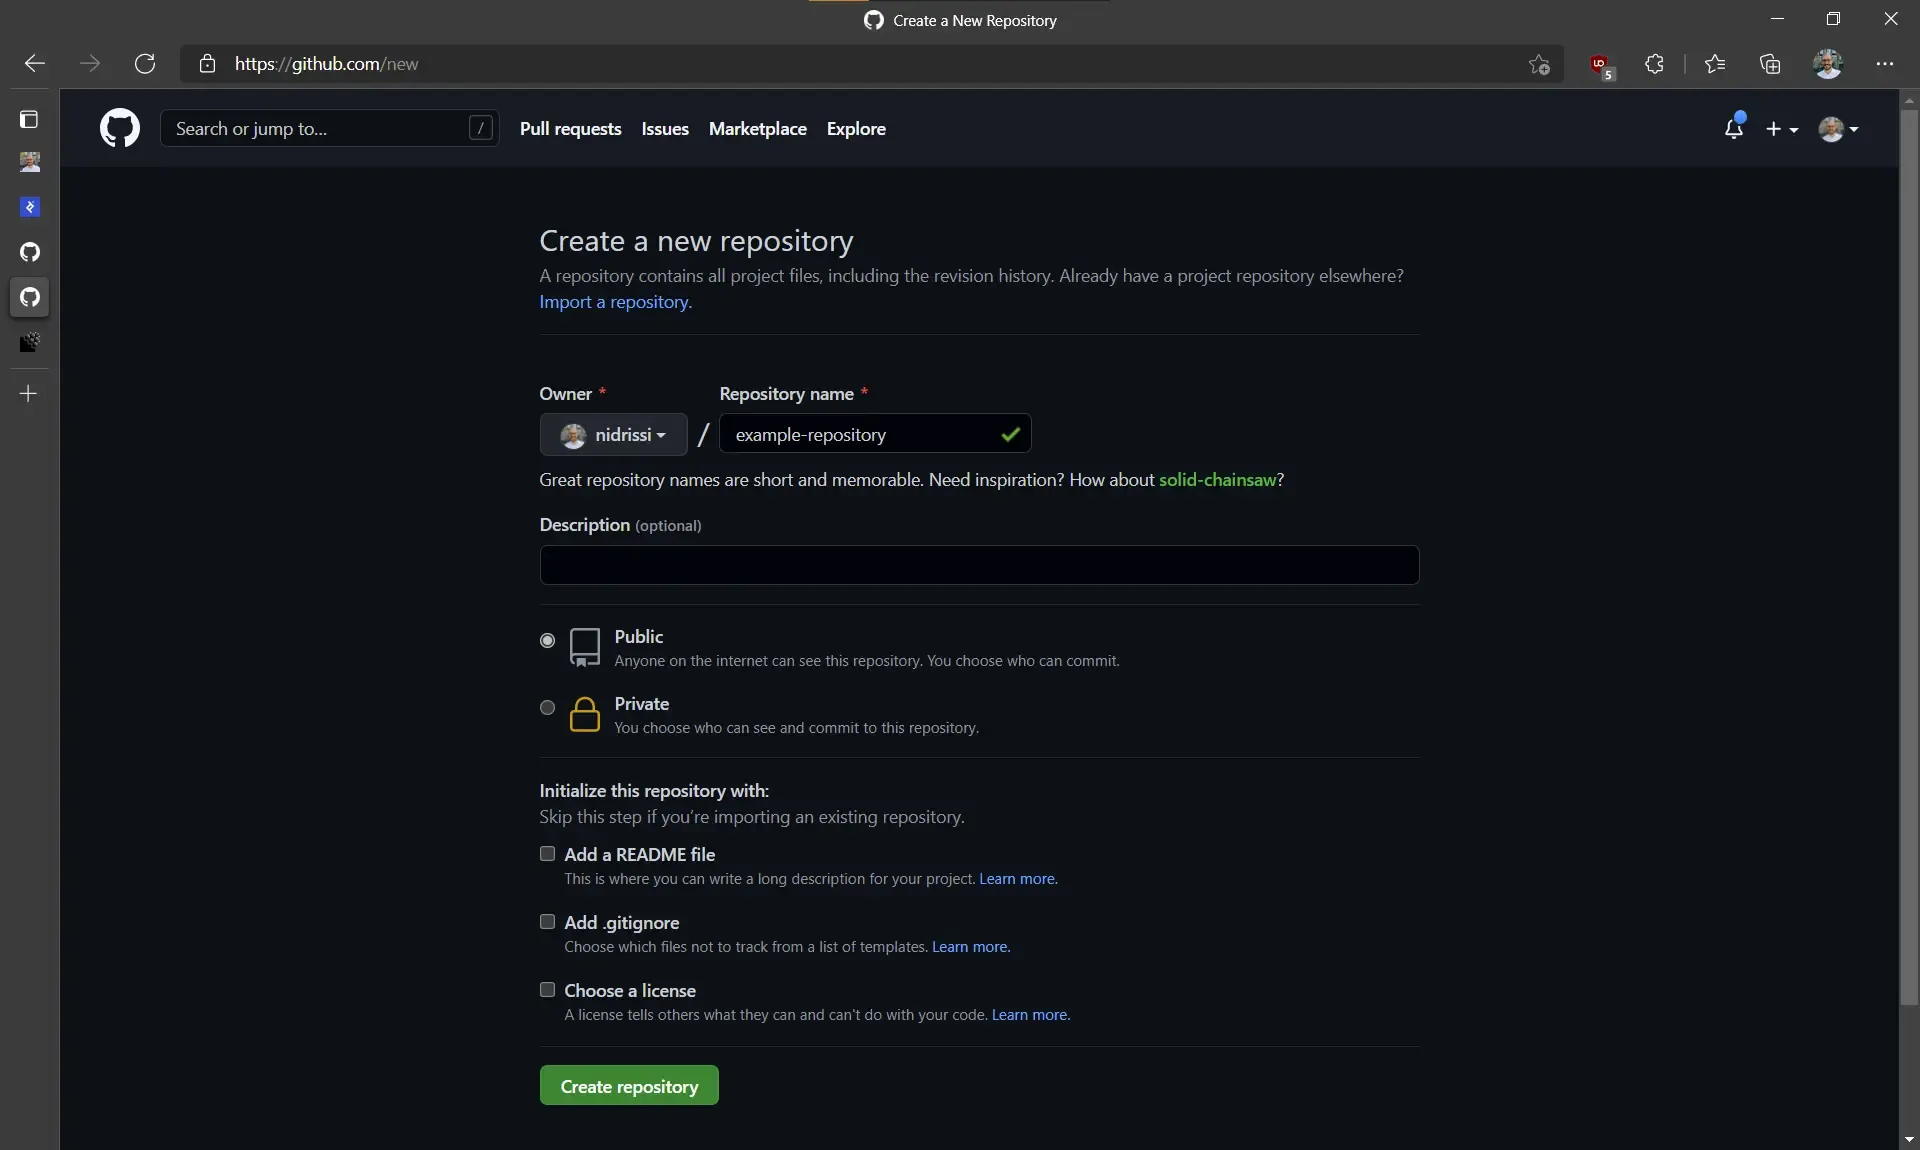
You can either set it to public or private. Note the URL of your repository when it appears on the next screen (or use the one I provide below). Then, you can clone it with the following command:
git clone https://github.com/nidrissi/example-repository.git
cd example-repository
This will create a new folder in the current directory called example-repository and copy everything from the remote repository into it.
Afterwards, assuming that you cloned my example repository, your folder will look like this:
example-repository/
├── .git/
├── sample.txt
└── some-folder/
    └── other-sample.txt
As you can see, the folder contains two things:
- A working copy of the latest files, here
sample.txtandsome-folder/other-sample.txt. - Git’s internal data in the special
.gitfolder: the commits, branches, objects, and so on. Unless you know what you are doing, I strongly recommend leaving that folder alone. Only interact with Git through shell commands or a graphical program.
You can now modify the files in this repository and use the commands from the next sections to track your changes. The remote is already configured. Pushing will work if your account has write access and you have authenticated with the hosting service.
Initializing a new repository
The other option, if you have no existing repository to clone, is to initialize a new one. The steps are simple:
- (Optional) Choose or create a folder that you want to track with Git.
- In the terminal, switch to that folder.
- Then type
git init -b mainin the terminal.
In a Linux shell, this would typically look like this (feel free to change the name of the folder, of course):
# skip the first step if the folder already exists:
mkdir -p ~/papers/riemann-hypothesis # 1. create a new folder
cd ~/papers/riemann-hypothesis    # 2. switch to that folder
git init -b main                  # 3. initialize the repository
Afterwards, your files should look like this:
~/papers/riemann-hypothesis/
├── .git/
├── other files (if some were already in the folder)
├── ...........
└── other files
In effect, initializing creates a .git folder and a branch with no commits yet.
You are then free to work on the files and track your changes with Git.
No remote is configured yet, so you will need to add one before collaborating or keeping an off-site copy.
Warning
Before running git init, make sure that you are in the intended root folder.
Running it in the wrong folder—or creating an accidental repository inside another repository—can make Git appear to track too much or too little.
git status and git rev-parse --show-toplevel help identify which repository you are currently in.
Do not delete a .git directory unless you are certain that its history is disposable.
Continue with Part 3b: daily work and collaboration.
Further reading
Here are some more resources to learn using Git:
- GitHub’s Git Guide. This is a great resource if you want to quickly get up to speed.
- GitHub’s “Hello World” tutorial.
- The Pro Git Book.